Hi Hany_national,
This month repair newsletter is quite interesting which is to
show you how you can make your own pcb. Please click on the
link below to access the article
How To Make Your Own PCB-A Step by Step Guide
Here is how you can make PCB (Printed Circuit Board) at your own with ease and choice. PCB Making Process
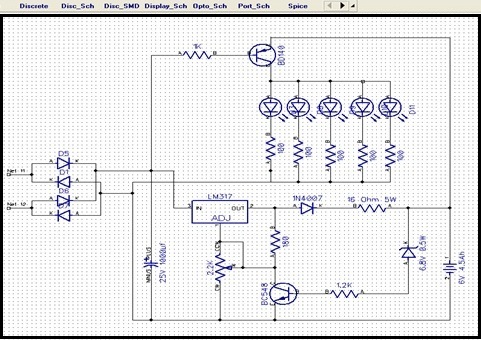
LED Lights Schematic
Step 1 (Drawing the Schematic)
Draw your schematic using any well-known drawing software. I am using Dip Trace software to schematize my projects. Use Schematic program to place the components on the board. Select the correct components from the libraries and paste them on the board. Now connect the parts with each other by ‘Place Wire’ tool. You can place parts anywhere on the board as per space and requirement. Step 2 (Converting the Schematic to PCB)
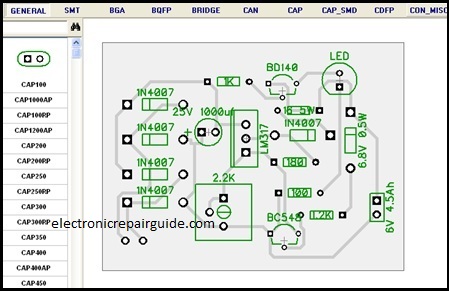
After placing components and joining them with each other, the next step is to make the PCB using schematic created in step 1. Press Ctrl+B to start PCB layout program. This will convert your schematic to PCB automatically. Here again you can relocate the components if you wish. After adjusting the parts manually, press ‘Run Auto Placement’ button to create the final Layout design. Step 3 (Printing the Layout onto the Glazed paper)
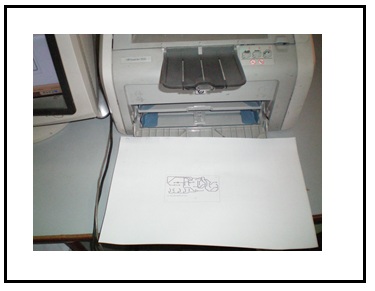
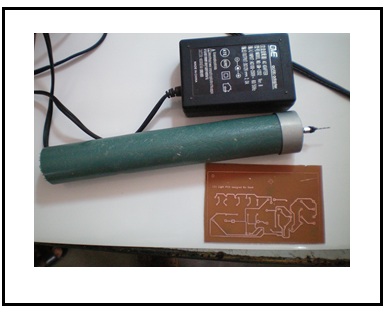
When the layout is done, now it is time to get it printed (toner transferred) onto the glossy paper with the help of a laser printer. Any glazed sheet, brochure, magazine paper or even photo paper can be used for this purpose. Place this printed paper downward onto the copper board and fasten it with adhesive tape.
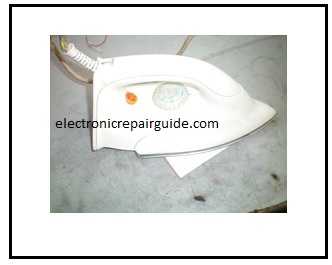
Now use a cloth iron to transfer the image from paper to copper board. Move the heated Iron onto the paper till its color turns to light brown. Normally heating from 60 to 90 seconds is sufficient. This is a mirror image and after printing it will be reflected in actual shape.
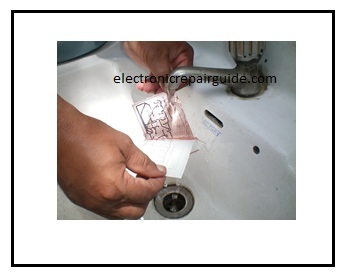
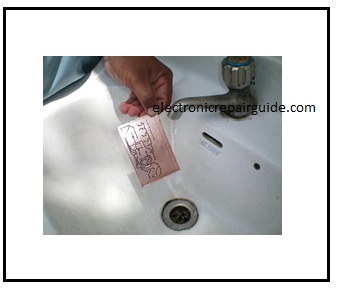
After ironing, the paper will stick to the board. Now soak it thoroughly to remove the paper, leaving only the toner behind.
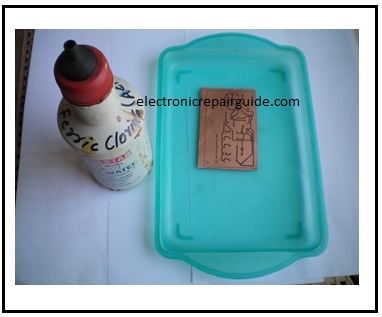
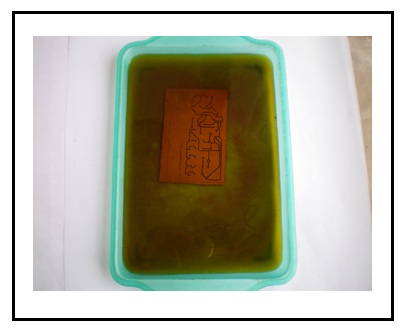
Step 4 (Etching the Copper)
Now you need to etch off the extra copper from your board. This would involve dipping the board in some chemical to eat away the exposed copper. You may use Ferric Chloride for this purpose. Cold (with normal temperature) chemical may take hours to complete etching. You may heat your chemical up to 55°C by placing its container into the hot water. Ferric Chloride having more than 55°C temperature may etch your board layout also, so care should be taken in this respect. This process may take 15-30 minutes depending on the temperature and freshness of chemical and thickness of copper.
Step 5 (Final Stage)
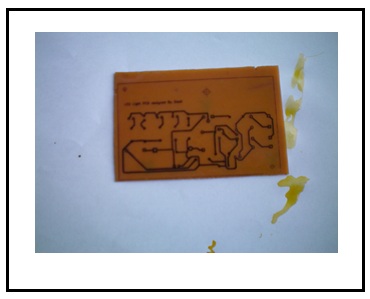
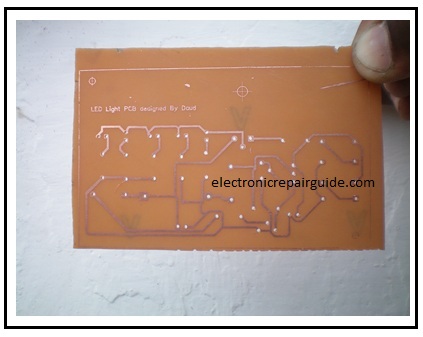
Photo of the raw copper board with toner remaining on it.
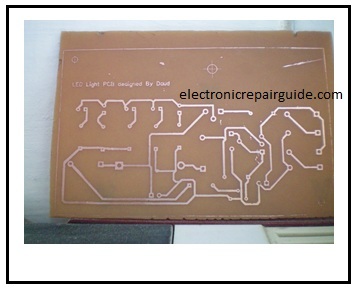
Copper board after rubbing / cleaning the toner and ready for drilling.
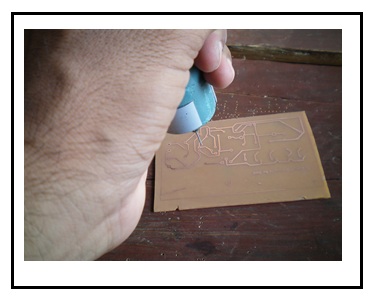
After etching process is complete, remove the toner with any solvent to dissolve the toner from the board or even you may rub it out. Almost your board is ready to be equipped with electronics components. To prevent the board from oxidizing you may tin it with soldering iron.
At this point, use a small drill machine to make holes to place the components on the board as well as mounting holes.
جهد مشكور الطريقه ممتازه جدا وشغال بيها من خمس سنوات
يااخي ممكن نستفيد من خبرتك في هذا المجال , من زمان وانا اتمنى ان اطبع دائرة بيدي جميع المواد متوفرة لدي الا المادة السحرية وهي (الحامض) سوالي هل يوجد بدائل لهذا الحامض يعني يكون متوفر بالاسواق ةالشيء الثاني ماهو نوع الحامض الافضل لهذة العملية ومقدار تخفيفه .ةياريت تتحفنة بمعلومات من حضرتك بخصوص هذا الموضوع.وخصوصا الحامض وشكرا .
شكرا اخى الكريم على الموضوع
بس الموضوع مش جديد بقاله فترة كبيرة على النت
وهى طباعة الكروت باوسطة البرنتر الليزر على ورق كوشية
طريقة قديمة
و هى تعطى نتائج قوية جدا وجيدة جدا