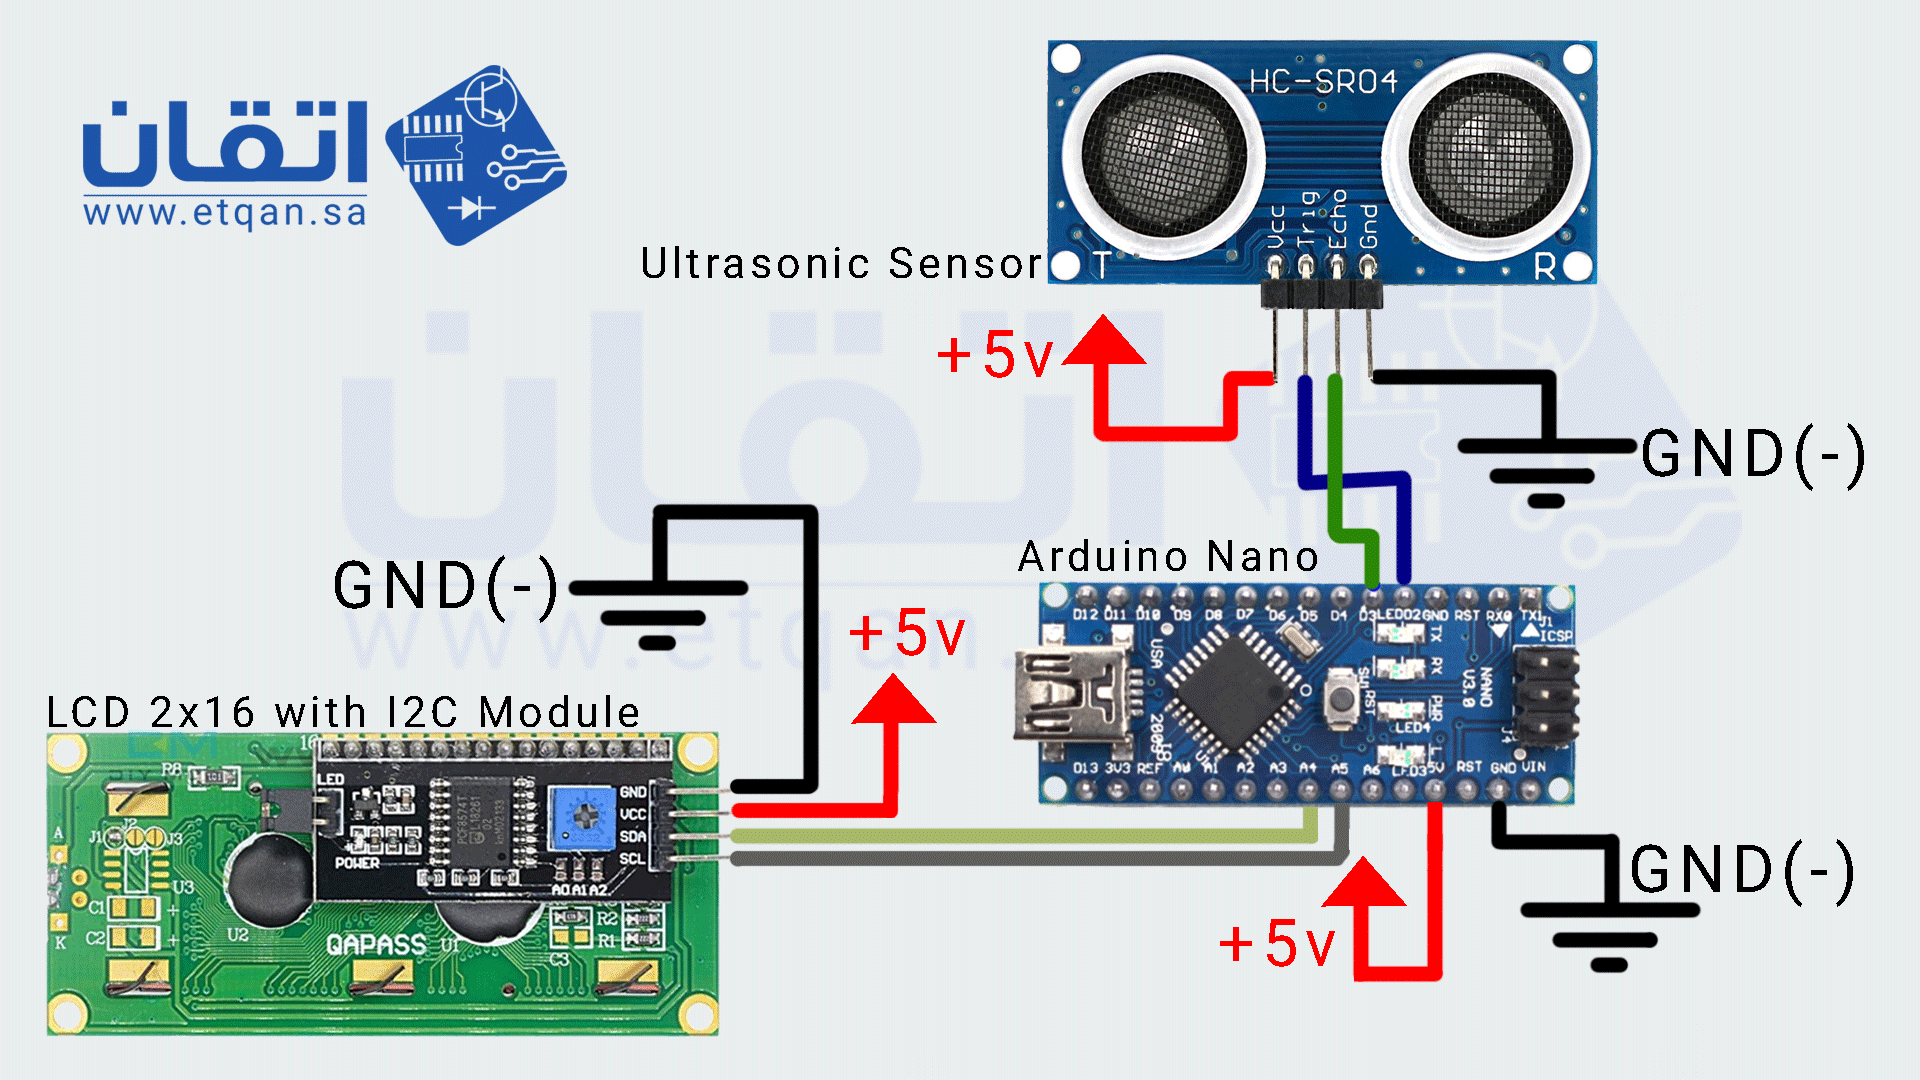
في هذا الفيديو تجربة لاستخدام حساس المسافة Ultrasonic Sensor module وتم استخدام اردوينو نانو Arduino Nano بالاضافة الى شاشة مع موديول ( آي اسكوير سي - I2C ) هذا الموديول يجعل استخدام LCD سهل وبسيط فبدلا من استخدام 6 اطراف من الاردوينو+ طرفين تغذية لكي نستطيع تشغيل الشاشة ... سنستخدم بدلا من ذلك طرفين فقط من الاردوينو + طرفين تغذية . هذا الموديول ايضا يمكننا من استخدام وحتى 8 شاشات في نفس الوقت كل شاشة لها عنوان مختلف وكل هذه الشاشات ستحتاج نفس الطرفين من الاردوينو.
https://www.youtube.com/watch?v=oEeeYngosGE
في هذه السلسلة من الدروس نوضح استخدام العديد من القطع والموديولات التي تخص الالكترونيات بحيث تعطي للهاوي وللمختص معلومات ثقافية مفيدة عن الكثير من القطع التي تخص الالكترونيات واردوينو وراسبيري باي .. ارجو نشر الفيديو قدر الامكان لتعم الفائدة
كود:
///////////// Ultrasonic Distance Meter By Ahmed Fayed www.etqan.sa
const int trigPin = 2;
const int echoPin = 3;
#include <LiquidCrystal_I2C.h>
// the LCD I2C Module contains A0,A1,A2 to change the address.
// so we make 3 addresses as below
// lcd1 address 0x27  because A0,A1, and A2 not soldered
// I2C module connected to A4 from arduino (SDA) and A5 (SCL)
LiquidCrystal_I2C lcd1(0x27, 16, 2); // LCD1
// defines variables
long duration;
int distance;
void setup() {
  pinMode(trigPin, OUTPUT); // Sets the trigPin as an Output
  pinMode(echoPin, INPUT); // Sets the echoPin as an Input
  lcd1.init();                      // initialize the lcd
  lcd1.backlight();
  lcd1.setCursor(3, 0);
  lcd1.print("UltraSonic");
  lcd1.setCursor(1, 1);
  lcd1.print("Distance Meter");
}
void loop() {
  digitalWrite(trigPin, LOW);
  delayMicroseconds(2);
  digitalWrite(trigPin, HIGH);
  delayMicroseconds(10);
  digitalWrite(trigPin, LOW);
  duration = pulseIn(echoPin, HIGH);
  distance = duration * 0.017;
  if (distance >= 4 && distance <= 350)
  { lcd1.setCursor(0, 1);
    lcd1.print("Distance=");
    lcd1.setCursor(9, 1);
    lcd1.print("      ");
    lcd1.setCursor(9, 1);
    lcd1.print(distance);
    lcd1.print("cm");
  }
  else
  { lcd1.setCursor(0, 1);
    lcd1.print("Distance=");
    lcd1.setCursor(9, 1);
    lcd1.print("      ");
  }
  delay(500);
}

 عريبى محمود ( شكر العضو على هذه المشاركة )
 عريبى محمود ( أعجبته المشاركة )


